Are you tired of spending money on those tiny herb packages at the grocery store? Well, get ready to embark on a flavorful journey as we explore how to grow oregano from seed indoors! This comprehensive guide will walk you through every step of the process, from selecting the right variety to harvesting your very own aromatic oregano leaves. By the end of this post, you’ll be well on your way to herb independence, saving money, and enjoying the satisfaction of nurturing your own little indoor herb garden. So, let’s dig in and discover the secrets to growing this versatile Mediterranean herb right in the comfort of
Why Grow Oregano Indoors? (Benefits of Homegrown Oregano)
Let’s face it, folks – there’s something magical about growing your own herbs, and oregano is no exception. But why should you bother growing oregano indoors when you can just grab a bunch from the store? Well, buckle up, because I’m about to blow your mind with the benefits of homegrown oregano!
Fresh Flavor on Demand
Imagine craving that perfect pizza or pasta sauce, and having fresh oregano at your fingertips. No more wilted, sad-looking herbs from the fridge – just snip what you need, when you need it!
Cost-Effective Herb Supply
Say goodbye to overpriced herb packets! Once you’ve mastered growing oregano indoors, you’ll have an endless supply without breaking the bank. It’s like having a money-saving superpower!
Year-Round Availability
Mother Nature can’t tell you when to enjoy your herbs anymore. Indoor oregano doesn’t care about seasons – it’s always summer in your kitchen!
Pest and Chemical-Free
You control what goes into your plants. No more worrying about pesticides or mysterious chemicals – just pure, organic oregano goodness.
But wait, there’s more! Growing oregano indoors isn’t just about the herb itself. It’s a whole experience that comes with some pretty sweet perks. For starters, it’s a great way to flex your green thumb without committing to a full-blown garden. Plus, there’s something incredibly satisfying about nurturing a plant from seed to harvest – it’s like being a plant parent!
And let’s not forget the aromatherapy benefits. Oregano has a distinct, comforting scent that can turn your home into a Mediterranean oasis. Feeling stressed? Just brush your hand over your oregano plant and breathe in that calming aroma. It’s like a mini-vacation for your senses!
So, are you ready to join the indoor oregano revolution? Trust me, once you start growing your own, you’ll wonder how you ever lived without it. It’s time to take control of your herb destiny and never buy overpriced, underwhelming oregano again!
Selecting the Right Oregano Variety for Indoor Growing
Alright, herb enthusiasts, it’s time to play matchmaker with your future oregano plant! Choosing the right variety for indoor growing is like swiping right on a dating app – you want to find the perfect match for your space and taste buds. Let’s dive into the world of oregano varieties and find your herbal soulmate!
Alright, herb enthusiasts, it’s time to play matchmaker with your future oregano plant! Choosing the right variety for indoor growing is like swiping right on a dating app – you want to find the perfect match for your space and taste buds. Let’s dive into the world of oregano varieties and find your herbal soulmate!
Greek Oregano (Origanum vulgare hirtum)
The classic choice for indoor growing, Greek oregano is the Ryan Gosling of the herb world – versatile, attractive, and always delivers on flavor. It’s compact, making it perfect for small spaces, and packs a punch in the taste department. This variety is ideal for those who love that traditional oregano flavor in their pizzas and pasta sauces.
Italian Oregano (Origanum x majoricum)
If Greek oregano is Ryan Gosling, then Italian oregano is the George Clooney – smooth, sophisticated, and with a hint of sweetness. This hybrid between oregano and marjoram offers a milder flavor profile, perfect for those who find Greek oregano a bit too intense. It’s like the “beginner’s oregano” – approachable and easy to love.
But wait, there’s more! For the adventurous indoor gardeners out there, consider these unique varieties:
- Golden Oregano (Origanum vulgare ‘Aureum’): This variety adds a pop of color to your indoor herb garden with its bright golden-yellow leaves. It’s like the Elle Woods of oregano – bright, perky, and surprisingly competent.
- Syrian Oregano (Origanum syriacum): Also known as Za’atar, this variety has a robust, earthy flavor that’s perfect for Middle Eastern cuisine. It’s the exotic traveler of the oregano world, bringing a taste of adventure to your kitchen.
- Hot and Spicy Oregano (Origanum vulgare ‘Hot and Spicy’): For those who like to live on the edge, this variety kicks things up a notch with a spicier flavor profile. It’s the daredevil of oreganos, perfect for adding a little excitement to your dishes.
When selecting your oregano variety, consider your culinary preferences, available space, and light conditions. Most oregano varieties are pretty adaptable, but some may require more attention than others. If you’re a newbie to indoor herb growing, stick with the tried-and-true Greek or Italian varieties. They’re like the reliable best friends of the herb world – always there when you need them and rarely let you down.
Remember, the key to successful indoor oregano growing is matching the variety to your environment and needs. Don’t be afraid to experiment with different types – you might discover a new favorite that becomes the star of your culinary creations!
Now that you’ve got the lowdown on oregano varieties, it’s time to make your choice and get growing. In the next section, we’ll dive into preparing the perfect seed starting mix to give your chosen oregano the best start in life. Get ready to play in the dirt – it’s about to get real!
Preparing the Seed Starting Mix (Soil Requirements)
Alright, green thumbs, it’s time to get down and dirty – literally! Preparing the perfect seed starting mix for your oregano is like creating a five-star hotel for your seeds. You want them to feel so comfortable that they can’t help but sprout and thrive. So, let’s roll up our sleeves and dive into the world of soil mixology!
The Perfect Oregano Soil Recipe
First things first, oregano is not a diva when it comes to soil, but it does have some preferences. Think of it as the easy-going friend who’s up for anything but secretly loves a good beach day. Here’s what you need to create the ideal oregano seed starting mix:
- 2 parts high-quality potting soil: This is your base, like the bread in a sandwich. Look for a light, well-draining potting mix. Avoid heavy garden soils – they’re like trying to grow herbs in a mud pie.
- 1 part perlite or vermiculite: These little white pellets are like tiny air pockets for your soil. They improve drainage and aeration, making sure your oregano roots don’t feel like they’re stuck in a swamp.
- 1 part coconut coir or peat moss: This helps retain moisture without making the soil soggy. It’s like giving your soil a sponge superpower.
Now, let’s talk pH. Oregano prefers slightly alkaline to neutral soil, with a pH range of 6.5 to 7.0. If you’re feeling fancy (or just really nerdy about gardening), you can test your soil pH with a simple kit from your local garden center. But honestly, most potting soils fall within this range, so don’t stress too much about it.
Mixing Your Soil Cocktail
Ready to play bartender for your oregano seeds? Here’s how to mix up that perfect soil cocktail:
- Grab a large container or bucket. This is your mixing bowl.
- Add your ingredients in the proportions mentioned above. Feel free to adjust slightly based on what you have on hand – oregano isn’t going to throw a fit over minor changes.
- Mix thoroughly. Get in there with your hands and really blend it up. It’s like giving your soil a massage – and hey, it’s good for your skin too!
- Add water until the mix is evenly moist but not soaking wet. It should feel like a wrung-out sponge.
Voilà! You’ve just created the Ritz-Carlton of seed starting mixes for your oregano. Your seeds are going to love their new digs!
Remember, good soil is the foundation of healthy plants. It’s like giving your oregano a head start in life. With this perfect mix, your seeds will have all the nutrients, drainage, and aeration they need to sprout into strong, flavorful plants.
Now that you’ve got your soil sorted, it’s time to move on to the exciting part – sowing those tiny oregano seeds! In the next section, we’ll walk through the step-by-step process of planting your oregano seeds indoors. Get ready to play seed fairy!
Sowing Oregano Seeds Indoors (Step-by-Step Guide)
Alright, future oregano farmers, it’s showtime! We’re about to embark on the magical journey of sowing oregano seeds indoors. It’s like planting tiny wishes that will grow into aromatic, flavorful plants. So, put on your imaginary gardening gloves, and let’s get seeding!
Step 1: Gather Your Materials
First things first, let’s assemble our seed-sowing toolkit: – Your perfectly mixed seed starting soil (from the previous section) – Small pots or seed trays with drainage holes – Oregano seeds (obviously!) – A spray bottle filled with water – Clear plastic wrap or a clear dome lid – A warm, bright spot in your home – Optional: a heating mat for faster germination
Step 2: Fill Your Containers
Fill your pots or seed trays with your homemade soil mix, leaving about 1/4 inch of space at the top. Pat it down gently – we’re aiming for cozy, not compacted. Think of it as fluffing a pillow for your seeds.
Step 3: Sow the Seeds
Oregano seeds are tiny, like specks of pepper. Sprinkle them on the surface of the soil – no need to bury them. They need light to germinate, so they’re like little sun worshippers. Aim for about 3-4 seeds per pot or cell in your tray. If you’re feeling fancy, you can use a toothpick to place them individually.
Step 4: Cover (But Not with Soil!)
Remember, no burying! Instead, use your spray bottle to mist the surface of the soil gently. This settles the seeds and provides moisture without washing them away. It’s like giving them a refreshing welcome shower.
Step 5: Create a Mini Greenhouse
Cover your pots or tray with clear plastic wrap or a clear dome lid. This creates a warm, humid environment that oregano seeds love. It’s like a spa day for your seeds!
Step 6: Find the Perfect Spot
Place your covered containers in a warm spot with bright, indirect light. The top of a refrigerator or near a bright window works well. If you’re using a heating mat, set it to about 70°F (21°C). Oregano seeds germinate best at temperatures between 65-70°F (18-21°C).
Step 7: Wait (Patiently)
Now comes the hard part – waiting! Oregano seeds typically germinate in 7-14 days. During this time, keep the soil moist but not waterlogged. Check daily and mist if needed. It’s like being a helicopter parent, but for plants.
Pro Tip: While you’re waiting, why not practice your Italian accent? Nothing says “I’m growing oregano” like dramatically exclaiming “Mamma mia, where’s my oregano?” every time you check your seeds.
Once your seeds sprout, remove the plastic cover and move them to a sunny spot. Congratulations! You’re now the proud parent of baby oregano plants. In the next section, we’ll talk about how to care for these tiny green miracles and ensure they grow into strong, flavorful herbs.
Remember, patience is key when growing herbs from seed. It might seem like nothing’s happening for a while, but trust me, those little seeds are working hard beneath the soil. Before you know it, you’ll have a forest of oregano sprouts ready to take on the world (or at least your kitchen)!
Providing the Optimal Light Conditions for Oregano
Alright, herb aficionados, it’s time to shed some light on the subject – literally! Providing the right light conditions for your oregano is crucial for growing strong, flavorful plants. Think of light as the espresso shot for your herbs – it gives them the energy they need to thrive. So, let’s dive into the world of photosynthesis and learn how to keep your oregano plants happy and well-lit!
The Light Lowdown
Oregano is like that friend who loves to soak up the sun – it thrives in bright light. In fact, oregano is one of the most light-loving herbs out there. Here’s what you need to know:
- Sunlight Requirements: Oregano needs at least 6-8 hours of direct sunlight daily. It’s basically the plant equivalent of a sun worshipper on a tropical beach.
- Indoor Challenges: Finding a spot in your home that provides enough natural light can be tricky, especially if you don’t have south-facing windows. But don’t worry, we’ve got solutions!
Natural Light Options
If you’re blessed with sunny windows, here are your best bets:
- South-facing windows: These are the gold standard for indoor oregano. They provide the most consistent light throughout the day.
- East or west-facing windows: These can work too, but your oregano might need to be rotated regularly to ensure even growth.
- North-facing windows: Sorry, northern exposure fans, but these windows typically don’t provide enough light for oregano. You’ll likely need to supplement with artificial lighting.
Artificial Lighting Solutions
Don’t have a sunny spot? No problem! We live in the future, and we’ve got lights for that. Here are some artificial lighting options to keep your oregano happy:
Fluorescent Grow Lights
These are a great, budget-friendly option. Use a combination of cool and warm bulbs to provide a full spectrum of light. Keep the lights about 6 inches above your plants and provide 14-16 hours of light per day.
LED Grow Lights
These are more energy-efficient and don’t produce as much heat. They come in full-spectrum options, making them perfect for oregano. Position them about 12-18 inches above your plants.
High-Intensity Discharge (HID) Lights
These are the heavy-duty option, great if you’re growing multiple herbs. They’re more expensive and produce more heat, but they’re incredibly effective.
Signs Your Oregano Isn’t Getting Enough Light
Keep an eye out for these telltale signs that your oregano is craving more light:
- Leggy growth: If your oregano starts looking like it’s trying to win a limbo contest, with long, spindly stems, it’s reaching for more light.
- Pale leaves: Lack of light can cause the leaves to lose their vibrant green color.
- Slow growth: If your oregano seems to be growing at a snail’s pace, it might need a light boost.
- Weak flavor: Insufficient light can lead to less flavorful leaves. Nobody wants bland oregano!
Remember, while oregano loves light, it’s also possible to overdo it. If you notice the leaves turning yellow or developing brown spots, your plant might be getting sunburned. In this case, move it slightly away from the light source or reduce the duration of artificial lighting.
By providing your oregano with optimal light conditions, you’re setting the stage for a bountiful harvest of flavorful leaves. In the next section, we’ll dive into the watering needs of your indoor oregano – because even sun-loving plants get thirsty!
Maintaining the Proper Watering Schedule for Indoor Oregano
Alright, herb enthusiasts, it’s time to talk about the wet and wild world of watering your indoor oregano! Watering might seem simple, but get it wrong, and you could end up with a drama queen plant that’s either desperately thirsty or drowning in excess. Don’t worry, though – I’m here to help you become the Goldilocks of oregano watering. Let’s dive in!
The Golden Rule of Oregano Watering
Here’s the secret sauce: Oregano prefers to be on the drier side. It’s like that friend who always forgets to bring a water bottle on hikes – surprisingly resilient and not too fussy about frequent drinks. In fact, oregano is more tolerant of under-watering than over-watering. So, when in doubt, it’s better to err on the side of dry.
The Perfect Watering Schedule
While there’s no one-size-fits-all watering schedule (wouldn’t that make life easier?), here’s a general guide to keep your oregano happy:
- Check the soil: Stick your finger about an inch into the soil. If it feels dry at that depth, it’s time to water.
- Water deeply: When you do water, do it thoroughly. Water until you see it coming out of the drainage holes at the bottom of the pot.
- Let it dry: Allow the top inch of soil to dry out completely before watering again. This usually means watering once every 7-10 days, but it can vary based on your home’s conditions.
- Adjust for seasons: Your oregano will need less water in winter when growth slows down. Think of it as the plant’s hibernation period.
Watering Do’s and Don’ts
Do:
- Use room temperature water to avoid shocking the roots.
- Water at the base of the plant to keep the leaves dry.
- Use well-draining pots to prevent water from sitting in the soil.
- Adjust your watering based on humidity and temperature in your home.
Don’t:
- Let your oregano sit in standing water – it’s not a duck!
- Water on a strict schedule without checking the soil first.
- Mist the leaves regularly – oregano prefers dry foliage.
- Panic if you forget to water once in a while – oregano is forgiving!
Signs of Improper Watering
Your oregano will let you know if it’s not happy with its watering situation. Here’s what to look out for:
Overwatering Signs
Yellowing leaves, wilting despite moist soil, mold on the soil surface, or a general “droopy” appearance. It’s like your plant is saying, “Help, I’m drowning here!”
Underwatering Signs
Crispy, brown leaf edges, slow growth, or leaves that look a bit deflated. Your oregano might be channeling its inner drama queen and fainting to get your attention.
The Humidity Factor
While we’re on the topic of water, let’s talk humidity. Oregano isn’t too picky about humidity, which is great news for indoor growers. It can tolerate the dry air in most homes just fine. However, if you live in an extremely dry climate or use a lot of air conditioning, you might want to place a small humidity tray near your oregano (but not under it – remember, it doesn’t like wet feet!).
Remember, watering is an art, not a science. It might take a little trial and error to find the perfect watering rhythm for your specific oregano plant. Don’t be afraid to adjust based on what you observe. Your oregano will appreciate your attentiveness, and before you know it, you’ll be speaking its language fluently!
Now that we’ve got watering down pat, in the next section, we’ll explore the exciting world of transplanting your oregano seedlings. Get ready to play musical chairs with your herbs!
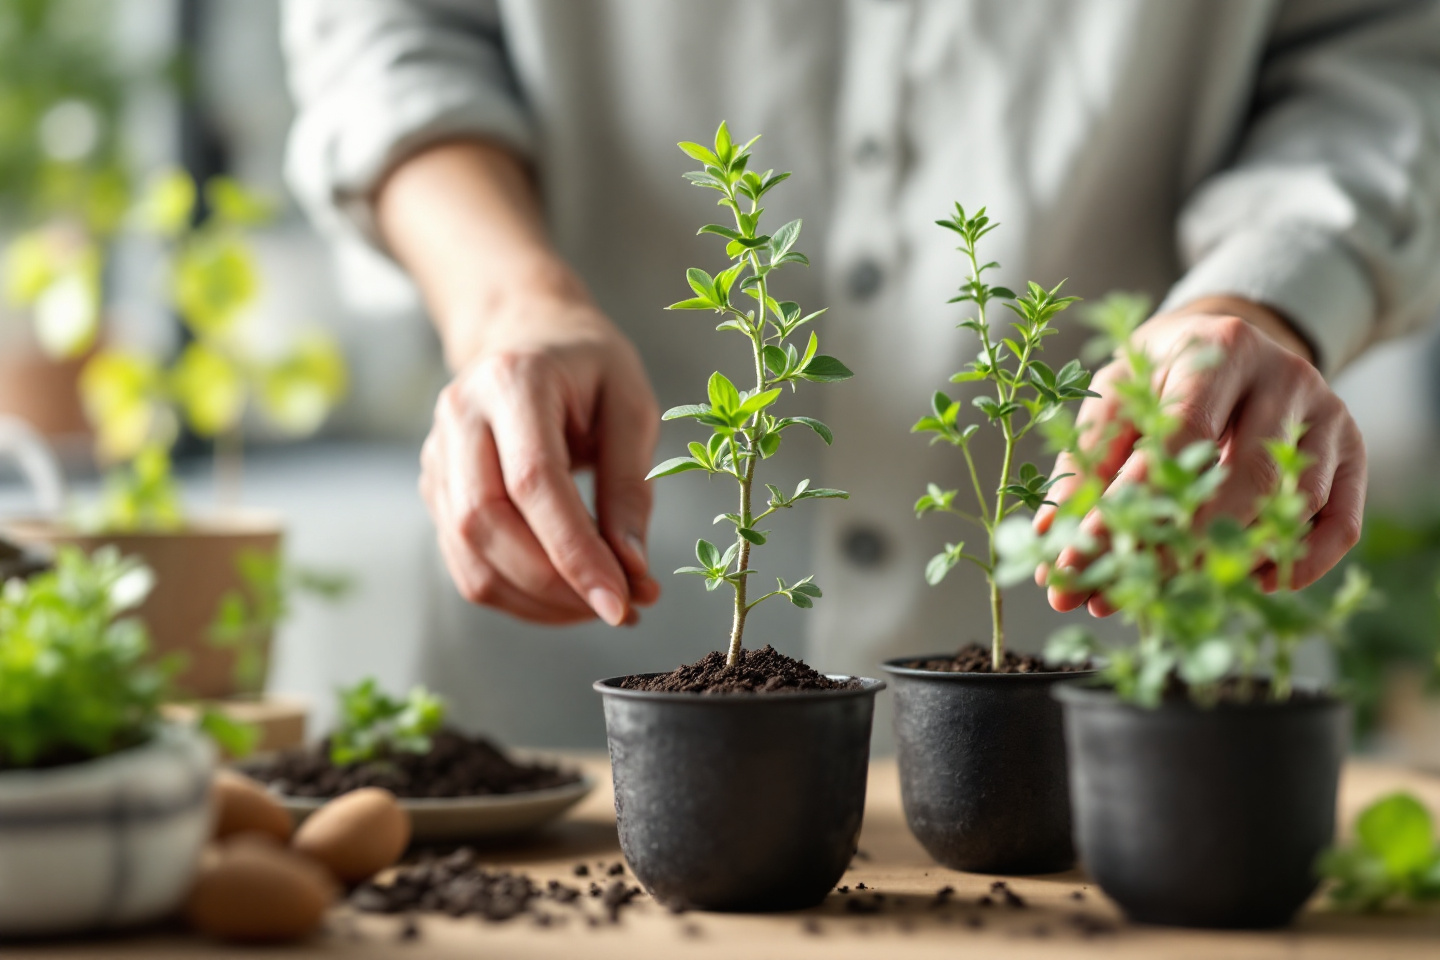
Transplanting Oregano Seedlings into Containers
Alright, green thumbs, it’s time for the big move! Your oregano seedlings have outgrown their starter homes and are ready for some roomier digs. Transplanting might sound intimidating, but don’t worry – I’ll walk you through it step by step. It’s like helping your plant-child move into their first apartment, only with less heavy furniture and more dirt. Let’s get started!
When to Transplant
Before we dive into the how, let’s talk about the when. Here are the signs that your oregano seedlings are ready for transplanting:
- They have at least 2-3 sets of true leaves (not counting the initial seed leaves).
- They’re about 2-3 inches tall.
- The seedlings are starting to look a bit crowded in their current container.
- It’s been about 4-6 weeks since you sowed the seeds.
If your seedlings tick these boxes, it’s time to prepare for Operation Oregano Relocation!
Choosing the Right Container
Selecting the perfect new home for your oregano is crucial. Here’s what to look for:
- Size: A 6-8 inch pot is ideal for a single oregano plant. Remember, oregano likes to spread out a bit, so give it room to grow.
- Material: Terracotta pots are great for oregano as they allow for better air circulation and moisture control. But any pot with good drainage will do.
- Drainage: Make sure the pot has drainage holes. Oregano hates wet feet more than I hate wearing wet socks!
The Transplanting Process
Now, let’s get our hands dirty! Here’s your step-by-step guide to transplanting oregano seedlings:
- Prepare the new pot: Fill your chosen container about 2/3 full with well-draining potting mix. Make a small depression in the center for your seedling.
- Water the seedlings: About an hour before transplanting, water your seedlings thoroughly. This helps reduce transplant shock and makes them easier to remove from their current home.
- Gently remove the seedling: Carefully squeeze the sides of the container to loosen the soil, then gently lift the seedling out. If you’re working with a biodegradable pot, you can plant it directly, but be sure to tear off the top edge so it doesn’t stick out above the soil.
- Place in the new pot: Set the seedling in the prepared hole, making sure it’s at the same depth as it was in its original container. The top of the root ball should be level with the soil surface.
- Fill and firm: Fill in around the seedling with potting mix, gently firming it down to eliminate air pockets. Don’t pack it too tightly – you want the roots to be able to spread easily.
- Water well: Give your newly transplanted oregano a good drink. Water until you see it coming out of the drainage holes.
- Place in a bright spot: Put your oregano in a sunny location or under grow lights. Remember, oregano loves light!
Post-Transplant Care
Your oregano might look a bit sad for a day or two after transplanting – it’s normal! Here’s how to help it adjust to its new home:
- Keep the soil consistently moist (but not waterlogged) for the first week.
- Hold off on fertilizing for about two weeks to give the roots time to establish.
- If you’re moving the plant outdoors, gradually acclimate it to direct sunlight over a week or two to prevent sunburn.
Congratulations! You’ve successfully helped your oregano upgrade its living situation. With proper care, your plant will soon be thriving in its new home, ready to provide you with aromatic leaves for all your culinary adventures.
In the next section, we’ll talk about how to keep your oregano happy and healthy with proper fertilization. Get ready to become a plant nutritionist!
Fertilizing Your Indoor Oregano Plants (Nutrient Needs)
Alright, herb enthusiasts, it’s time to talk about plant food! Fertilizing your indoor oregano might sound about as exciting as watching paint dry, but trust me, it’s the secret sauce to growing lush, flavorful herbs. Think of it as giving your oregano a gourmet meal instead of fast food. Let’s dive into the world of oregano nutrition and learn how to keep your plants happy, healthy, and bursting with flavor!
Understanding Oregano’s Nutritional Needs
Here’s the thing about oregano – it’s not a glutton. In fact, it’s more like that friend who’s always on a diet. Oregano prefers lean, slightly poor soil conditions. Over-fertilizing can actually reduce the intensity of its flavor and aroma. So, when it comes to feeding your oregano, less is definitely more.
The NPK Lowdown
When you’re shopping for fertilizer, you’ll see three numbers on the package, like 5-10-5. These represent the ratio of Nitrogen (N), Phosphorus (P), and Potassium (K). Here’s what oregano likes:
- Nitrogen (N): Promotes leaf growth. Oregano needs a moderate amount.
- Phosphorus (P): Supports root development. Oregano doesn’t need much of this.
- Potassium (K): Enhances overall plant health. A moderate amount is good for oregano.
A balanced, all-purpose fertilizer with equal parts NPK (like 10-10-10) diluted to half-strength is usually perfect for oregano.
Fertilizing Schedule
Now, let’s talk timing. Here’s a simple schedule to keep your oregano well-fed without overdoing it:
- Initial Feeding: Start fertilizing about 2 weeks after transplanting or when your seedlings are about 4 inches tall.
- Growing Season: Feed your oregano every 4-6 weeks during the spring and summer growing season.
- Winter: Reduce or stop fertilizing in late fall and winter when growth slows down. Your oregano is basically hibernating, and it doesn’t need the extra nutrients.
Types of Fertilizers
You’ve got options when it comes to fertilizing your oregano. Let’s break them down:
Liquid Fertilizers
These are easy to apply and fast-acting. Mix with water and apply when you’re watering your plant. It’s like giving your oregano a nutrient smoothie!
Slow-Release Granules
These little pellets release nutrients over time. Sprinkle them on the soil surface and water in. It’s like setting up a nutrient drip for your plant.
Organic Options
Compost tea, fish emulsion, or seaweed extracts are great organic choices. They’re gentle and provide a range of micronutrients. It’s like serving your oregano an organic, farm-to-table meal!
Signs of Nutrient Deficiency
Even with the best intentions, sometimes our oregano plants might need a little extra TLC. Here are some signs that your plant might be crying out for nutrients:
- Yellowing leaves: Could indicate nitrogen deficiency.
- Purple-tinged leaves: Might suggest a phosphorus deficiency.
- Brown leaf edges: Could be a sign of potassium deficiency.
- Stunted growth: Might indicate an overall lack of nutrients.
If you notice any of these signs, don’t panic! Just give your oregano a light feeding and monitor its progress.
The Golden Rule of Fertilizing
Remember, when it comes to fertilizing oregano, always err on the side of caution. It’s better to under-fertilize than over-fertilize. If you’re unsure, start with a weaker solution and observe how your plant responds. You can always add more, but it’s hard to take it away once it’s there!
By following these guidelines, you’ll be well on your way to growing healthy, flavorful oregano that would make any Italian grandmother proud. In our next section, we’ll tackle the not-so-fun but oh-so-important topic of pest control. Get ready to become the bodyguard your oregano never knew it needed!
Controlling Pests and Diseases in Indoor Oregano
Alright, herb heroes, it’s time to put on your protective gear and dive into the world of pest and disease control for your indoor oregano. Don’t worry, we’re not talking about suiting up in hazmat suits (although that would be pretty cool). We’re going to learn how to keep your oregano plants healthy and bug-free using simple, often organic methods. Think of yourself as the bouncer at Club Oregano – your job is to keep the troublemakers out!
Common Pests That Love Oregano
Even though oregano is generally pretty resistant to pests, a few uninvited guests might try to crash your herb party. Here are the usual suspects:
Aphids
These tiny green or black bugs love to suck the sap from your oregano leaves. They’re like little vampires, but instead of capes, they wear… well, nothing. They’re bugs.
Spider Mites
These microscopic mites create fine webs on your plant and can cause leaves to yellow and drop. Think of them as the world’s tiniest, most annoying spiders.
Whiteflies
Small, white, flying insects that cluster on the undersides of leaves. They’re like snowflakes, if snowflakes were alive and wanted to eat your plants.
Fungus Gnats
These small flies love moist soil and can be a nuisance. They’re like the fruit flies of the plant world – small, annoying, and seemingly everywhere.
Pest Control Strategies
Now that we know our enemies, let’s talk about how to send them packing:
- Manual Removal: For larger pests, simply picking them off by hand can be effective. It’s like playing a very tiny, slightly gross game of “Operation”.
- Water Spray: A strong spray of water can dislodge many pests. It’s like giving your plant a power wash, but gentler.
- Insecticidal Soap: This is a safe, effective option for most soft-bodied insects. You can buy it or make your own with mild dish soap and water.
- Neem Oil: An organic option that disrupts the life cycle of many pests. It’s like kryptonite for bugs!
- Sticky Traps: Yellow sticky traps can catch flying pests like whiteflies and fungus gnats. It’s like setting up a bug hotel, but with a “you can check in, but you can’t check out” policy.
Common Diseases in Oregano
While oregano is generally hardy, it can sometimes fall victim to a few diseases:
- Root Rot: Caused by overwatering and poor drainage. It’s like your plant is wearing wet socks all the time – not comfortable!
- Powdery Mildew: A white, powdery fungus that appears on leaves. It’s like your plant got into a fight with a bag of flour, and lost.
- Leaf Spot: Dark spots on leaves that can be caused by various fungi. It’s like your plant got a bad case of plant acne.
Disease Prevention and Treatment
An ounce of prevention is worth a pound of cure, especially when it comes to plant diseases. Here’s how to keep your oregano healthy:
Proper Watering
Water at the base of the plant and avoid getting leaves wet. It’s like giving your plant a drink without making it take a shower.
Good Air Circulation
Don’t crowd your plants. Give them room to breathe. Think of it as social distancing for plants.
Clean Tools
Always use clean, sharp tools when pruning. It’s like washing your hands, but for gardening.
Organic Fungicides
If needed, use organic fungicides like neem oil or a baking soda solution. It’s like giving your plant some natural medicine.
The Power of Prevention
Remember, the best defense is a good offense. Keep your oregano plants healthy by providing the right amount of light, water, and nutrients, and they’ll be better equipped to fight off pests and diseases on their own. It’s like building up your plant’s immune system!
By staying vigilant and acting quickly at the first sign of trouble, you can keep your indoor oregano thriving and pest-free. In our next section, we’ll move on to the fun part – harvesting your homegrown oregano! Get ready to reap the flavorful rewards of your hard work!
Harvesting and Preserving Your Homegrown Oregano
Congratulations, herb heroes! You’ve nurtured your oregano from tiny seeds to lush, aromatic plants. Now comes the best part – harvesting and enjoying the fruits (or rather, leaves) of your labor! But hold your horses, or should I say, hold your herb scissors. There’s a right way to harvest oregano to ensure your plant stays healthy and productive. Let’s dive into the art of harvesting and preserving your homegrown oregano!
When to Harvest
Timing is everything when it comes to harvesting oregano. Here’s what you need to know:
- First Harvest: Wait until your oregano plant is about 4-5 inches tall and has at least 6 sets of leaves.
- Best Flavor: Harvest just before the plant flowers for the most intense flavor. It’s like catching oregano at its teenage years – full of attitude and flavor!
- Time of Day: Harvest in the morning after the dew has dried but before the heat of the day. This is when the essential oils are most concentrated.
- Frequency: You can harvest oregano throughout the growing season. Regular harvesting actually encourages bushier growth.
How to Harvest
Now, let’s talk technique. Harvesting oregano is not a hack-and-slash operation – it requires finesse:
- Clean Tools: Use clean, sharp scissors or pruning shears. We don’t want to introduce any nasties to our precious herb!
- Where to Cut: Cut stems about 2/3 of the way down the plant, just above a set of leaves. This encourages new growth.
- How Much: Never harvest more than 1/3 of the plant at a time. We want to leave enough for the plant to recover and keep growing.
- Be Gentle: Handle the plant gently to avoid damaging the remaining stems and leaves.
Preserving Your Oregano
So, you’ve harvested a bounty of oregano. Now what? Here are some ways to preserve your herb haul:
Drying
Tie small bundles of oregano stems together and hang them upside down in a warm, dry, well-ventilated area. It’s like creating oregano wind chimes! Once dry, strip the leaves from the stems and store in an airtight container.
Freezing
Chop fresh oregano and place in ice cube trays with a bit of water or olive oil. Once frozen, transfer the cubes to a freezer bag. It’s like having little flavor bombs ready to drop into your cooking!
Refrigerating
For short-term storage, wrap fresh oregano in slightly damp paper towels and store in a plastic bag in the fridge. It’ll stay fresh for about a week.
Oregano-Infused Oil
Gently heat fresh oregano in olive oil, then strain and store in the fridge. It’s like creating your own gourmet cooking oil!
Using Your Homegrown Oregano
Now that you’ve successfully grown, harvested, and preserved your oregano, it’s time to enjoy it! Here are some ways to use your homegrown herb:
- Italian Cuisine: Add to pasta sauces, pizza, and tomato-based dishes.
- Greek Dishes: Use in Greek salads, with roasted lamb, or in tzatziki sauce.
- Marinades: Incorporate into marinades for meats and vegetables.
- Herb Butter: Mix chopped oregano into softened butter for a flavorful spread.
- Herbal Tea: Steep dried oregano leaves for a soothing, aromatic tea.
Remember, fresh oregano has a more intense flavor than dried, so use it sparingly at first and adjust to taste. Your homegrown oregano will likely be more potent than store-bought, so prepare for a flavor explosion!
Congratulations! You’ve now mastered the art of growing, harvesting, and using oregano. In our next section, we’ll explore some delicious recipes that showcase your homegrown herb. Get ready to become the culinary star of your own kitchen!
Recipes and Cooking Tips for Fresh Oregano
Alright, culinary adventurers, it’s time to put your homegrown oregano to the test! Now that you’ve successfully cultivated this aromatic herb, let’s explore some mouthwatering recipes and clever cooking tips that will make your taste buds dance and your kitchen smell like a Mediterranean paradise. Get ready to impress your friends and family with your herb-growing prowess and culinary skills!
Cooking with Fresh Oregano: Tips and Tricks
Before we dive into recipes, let’s cover some essential tips for cooking with fresh oregano:
- Add it Late: Unlike some herbs, oregano’s flavor holds up well to cooking. However, for the freshest taste, add it towards the end of cooking.
- Strip the Leaves: The stems can be woody, so strip the leaves off before chopping.
- Chop Finely: Oregano leaves can be a bit tough, so chop them finely for the best texture.
- Start Small: Fresh oregano is more potent than dried. Start with less than you think you need and adjust to taste.
- Pair it Well: Oregano pairs beautifully with tomatoes, olive oil, lemon, and garlic.
Delicious Recipes Featuring Fresh Oregano
Now, let’s get cooking! Here are some fantastic recipes that showcase your homegrown oregano:
Greek Salad with Oregano Vinaigrette
Whisk together olive oil, red wine vinegar, fresh oregano, garlic, and a touch of honey. Toss with cucumber, tomatoes, red onion, olives, and feta cheese. It’s like a Mediterranean vacation in a bowl!
Oregano Pesto Pasta
Blend fresh oregano, basil, garlic, pine nuts, Parmesan cheese, and olive oil. Toss with hot pasta and cherry tomatoes. It’s pesto with a twist that’ll make your taste buds do a happy dance!
Lemon Oregano Grilled Chicken
Marinate chicken breasts in lemon juice, olive oil, fresh oregano, garlic, and a touch of honey. Grill until juicy and serve with a side of Greek-style roasted potatoes. It’s like summer on a plate!
Oregano Infused Olive Oil
Gently heat olive oil with fresh oregano sprigs, then strain and cool. Use for dipping bread, drizzling over salads, or as a base for vinaigrettes. It’s liquid gold with an herbal twist!
Oregano Beyond the Kitchen
Believe it or not, oregano’s uses extend beyond the culinary world. Here are some unique ways to use your homegrown herb:
- Oregano Tea: Steep fresh or dried oregano leaves in hot water for a soothing, aromatic tea. It’s like a spa day for your taste buds!
- Natural Air Freshener: Simmer oregano leaves in water on the stove for a natural, refreshing scent. It’s like creating your own organic Febreze!
- Oregano-Infused Honey: Add a few sprigs of fresh oregano to warm (not hot) honey. Let it infuse for a week, then strain. Use in teas or drizzle over cheese. It’s nature’s flavor booster!
- Oregano Bath Soak: Add dried oregano leaves to your bathwater for a relaxing, aromatic soak. It’s like turning your tub into a Greek island hot spring!
Oregano Flavor Pairings
To help you get creative in the kitchen, here are some flavors that pair beautifully with oregano:
- Vegetables: Tomatoes, zucchini, eggplant, bell peppers, onions
- Proteins: Chicken, lamb, fish, eggs
- Other Herbs and Spices: Basil, thyme, garlic, lemon
- Dairy: Feta cheese, mozzarella, ricotta
- Grains: Pasta, rice, quinoa
Remember, cooking is all about experimentation and personal taste. Don’t be afraid to get creative with your homegrown oregano. Try adding it to your favorite recipes and see how it transforms the flavors. Who knows? You might just create your next signature dish!
Now that you’re armed with recipes and cooking tips, it’s time to put that oregano to good use. In our next section, we’ll explore how to keep your indoor oregano plant thriving for years to come. Get ready to become a long-term oregano parent!
Extending the Life of Your Indoor Oregano Plant
Congratulations, herb aficionados! You’ve successfully grown, harvested, and cooked with your homegrown oregano. But why stop there? With the right care, your indoor oregano plant can be a gift that keeps on giving, providing you with fresh herbs for years to come. Let’s dive into the secrets of extending the life of your oregano plant, turning you from a casual herb grower into a bonafide oregano whisperer!
The Key to Longevity: Proper Maintenance
Keeping your oregano plant healthy and productive over the long term is all about consistent care. Here are the key areas to focus on:
Regular Pruning
Pruning isn’t just for harvesting – it’s crucial for plant health. Regularly trim your oregano to encourage bushier growth and prevent it from getting leggy. It’s like giving your plant a haircut to keep it looking fresh!
Repotting
Every 1-2 years, repot your oregano into a slightly larger container with fresh potting mix. This gives the roots room to grow and replenishes nutrients. Think of it as moving your plant to a bigger apartment with a fully stocked fridge!
Soil Refresh
Even if you’re not repotting, replace the top inch of soil every spring with fresh potting mix. It’s like giving your plant a nutrient facial!
Winter Care
Oregano is perennial, but growth slows in winter. Reduce watering and stop fertilizing during this time. It’s like letting your plant have a little winter hibernation.
Dealing with Common Long-Term Issues
Even with the best care, you might encounter some challenges as your oregano plant ages. Here’s how to tackle them:
- Woody Stems: If your oregano develops woody stems, don’t panic! Cut them back hard in early spring to encourage fresh growth. It’s like giving your plant a rejuvenating spa treatment.
- Flowering: While oregano flowers are pretty and edible, they can reduce leaf production. Pinch off flower buds as they appear to keep your plant focused on leaf growth. It’s like telling your plant, “Hey, let’s stay young and leafy!”
- Leaf Discoloration: If leaves start yellowing, it could be a sign of nutrient deficiency. Give your plant a boost with a balanced, water-soluble fertilizer. It’s like serving your plant a nutritious smoothie!
- Pest Resurgence: Long-term indoor plants can sometimes face recurring pest issues. Regularly inspect your plant and treat any problems promptly. Think of yourself as your plant’s personal bodyguard.
Propagation: The Gift That Keeps on Giving
Want to expand your oregano empire? Propagation is the way to go! Here’s how to create new plants from your existing one:
- Stem Cuttings: Cut a 4-inch stem just below a leaf node, remove the lower leaves, and place in water or moist soil. Roots should develop in 2-3 weeks.
- Division: Every 2-3 years, you can divide a large oregano plant. Gently separate the root ball into sections, each with stems and roots, and replant.
- Layering: Bend a long stem to the soil, cover part of it with soil, and secure with a small stone. It will root where it touches the soil.
Creating the Perfect Long-Term Environment
To keep your oregano thriving year after year, focus on creating an ideal growing environment:
Light
Ensure your oregano gets at least 6 hours of bright light daily. If natural light is limited, consider supplementing with grow lights.
Temperature
Oregano prefers temperatures between 60-80°F (15-27°C). Avoid placing it near drafty windows or heat sources.
Humidity
While oregano isn’t fussy about humidity, a small pebble tray can provide a bit of extra moisture in dry environments.
Air Circulation
Good air flow prevents fungal issues. Use a small fan if your space is stuffy.
Remember, growing oregano is a journey, not a destination. With patience, care, and a little bit of plant parenting skills, your oregano can be a long-term companion in your culinary adventures. Embrace the process, learn from any challenges, and most importantly, enjoy the flavorful rewards of your efforts!
In our next section, we’ll troubleshoot some common oregano growing problems and provide solutions. Get ready to become the plant doctor your oregano never knew it needed!
Common Oregano Growing Problems (and How to Fix Them)
Alright, herb heroes, it’s time to put on your detective hats and dive into the world of oregano troubleshooting. Even with the best care, our leafy friends can sometimes face challenges. But don’t worry! We’re about to turn you into oregano problem-solving pros. Let’s explore some common issues you might encounter and learn how to fix them faster than you can say “pizza seasoning”!
Problem #1: Yellowing Leaves
If your oregano is looking a bit jaundiced, it might be trying to tell you something:
- Overwatering: The most common cause of yellowing leaves. Check if the soil is waterlogged and adjust your watering schedule.
- Nutrient Deficiency: If the yellowing starts from the bottom leaves, it might be a nitrogen deficiency. Time for a light feeding!
- Too Much Sun: Yes, oregano loves sun, but even sun-lovers can get a sunburn. If leaves are yellowing and crispy, move to a slightly shadier spot.
The Fix: Adjust watering, feed with a balanced fertilizer, or relocate your plant as needed. Remember, it’s easier to revive an underwatered plant than an overwatered one!
Problem #2: Leggy Growth
Is your oregano looking more like a giraffe than a bushy herb? Here’s what might be going on:
- Insufficient Light: Oregano stretches towards light when it’s not getting enough.
- Overcrowding: Plants competing for light can grow tall and spindly.
- Lack of Pruning: Regular trimming encourages bushy growth.
The Fix: Move your plant to a brighter spot, give it more space, and don’t be shy with those pruning shears. Give it a good haircut and watch it bounce back bushier than ever!
Problem #3: Pest Infestation
Unwanted guests on your oregano? Let’s evict them:
Aphids
These tiny green or black bugs cluster on stems and leaves. Blast them off with water or use insecticidal soap.
Spider Mites
Look for fine webbing and stippled leaves. Increase humidity and treat with neem oil.
Whiteflies
Small white flying insects. Use yellow sticky traps and insecticidal soap.
Fungus Gnats
Tiny flies in the soil. Let the soil dry out more between waterings and use sticky traps.
The Fix: Identify the pest and treat accordingly. Remember, prevention is better than cure, so regularly inspect your plants and maintain good air circulation.
Problem #4: Fungal Diseases
If your oregano is looking a bit under the weather, fungi might be to blame:
- Powdery Mildew: White powdery spots on leaves. Improve air circulation and treat with a fungicide if necessary.
- Root Rot: Wilting despite moist soil. This is usually due to overwatering. Let the soil dry out and consider repotting in fresh, well-draining soil.
- Leaf Spot: Dark spots on leaves. Remove affected leaves and avoid overhead watering.
The Fix: Adjust care practices to prevent moisture buildup, improve air circulation, and treat with organic fungicides if needed.
Problem #5: Flowering Too Early
While oregano flowers are pretty, they can signal the end of leaf production:
- Stress: Plants might flower early due to heat or drought stress.
- Age: Mature plants naturally want to reproduce.
- Variety: Some oregano varieties are more prone to early flowering.
The Fix: Pinch off flower buds as soon as they appear to encourage continued leaf growth. Keep your plant happy with regular pruning and optimal growing conditions.
Problem #6: Bitter Taste
If your oregano is tasting more bitter than spicy-sweet, consider these factors:
- Over-maturity: Older leaves tend to be more bitter.
- Flowering: Once a plant flowers, the leaves can become bitter.
- Stress: Heat or drought stress can affect flavor.
The Fix: Harvest leaves regularly before they mature too much, prevent flowering, and ensure your plant isn’t stressed. You might also want to taste-test different varieties to find your perfect flavor profile.
Remember, every plant problem is an opportunity to learn and become a better herb gardener. Don’t get discouraged if you face challenges – it’s all part of the journey! With a little patience and these troubleshooting tips, you’ll be well-equipped to handle whatever your oregano throws at you.
In our final section, we’ll wrap up with some inspiring thoughts on enjoying your endless supply of fresh oregano. Get ready to celebrate your herbal success!
Enjoy Your Never-Ending Supply of Fresh Oregano!
Congratulations, herb enthusiasts! You’ve made it to the finish line of our oregano-growing marathon. But unlike a real marathon, this race never truly ends – and that’s the best part! You’ve now got the knowledge and skills to maintain a never-ending supply of fresh, aromatic oregano right in your own home. Let’s take a moment to reflect on your journey and look forward to the delicious future ahead.
The Oregano Odyssey: A Recap
Let’s quickly revisit the incredible journey you’ve been on:
- You started with tiny seeds, nurturing them into strong seedlings.
- You learned the art of transplanting, giving your oregano a cozy new home.
- You mastered the delicate balance of watering, feeding, and providing the perfect amount of light.
- You became a plant doctor, diagnosing and treating common oregano ailments.
- You transformed into a master harvester, knowing exactly when and how to snip those flavorful leaves.
- And finally, you became a culinary wizard, incorporating your homegrown oregano into delicious dishes.
Give yourself a pat on the back – you’ve come a long way!
The Gift That Keeps On Giving
Now that you have your own thriving oregano plant, the possibilities are endless. Here’s what you have to look forward to:
Culinary Adventures
From pizza to pasta, salads to sauces, your homegrown oregano will elevate every dish. Experiment with new recipes and cuisines – your taste buds will thank you!
Herbal Remedies
Oregano isn’t just tasty – it’s also known for its potential health benefits. Try making oregano tea or infused oil for a natural boost.
Aromatic Ambiance
Your oregano plant isn’t just functional – it’s a beautiful, fragrant addition to your home. Enjoy the Mediterranean vibes it brings to your space.
Sustainable Living
By growing your own herbs, you’re reducing packaging waste and food miles. Plus, you know exactly what goes into growing your oregano – no mystery chemicals here!
Spreading the Herbal Love
Now that you’re an oregano expert, why not share the love? Here are some ideas:
- Gift Oregano Plants: Propagate your plant and give small oregano starters as gifts. It’s like giving the gift of flavor!
- Host a Cooking Class: Invite friends over for a cooking session featuring your homegrown oregano. Share your growing tips while you’re at it!
- Create Oregano-Infused Gifts: Make oregano-infused olive oil or salt as unique, homemade presents.
- Start an Herb Exchange: Connect with other herb growers in your community to swap cuttings and tips.
The Future of Your Oregano Journey
As you continue your oregano-growing adventure, remember that each day brings new opportunities to learn and grow (pun intended). Here are some ways to keep evolving your herb game:
- Experiment with Varieties: Try growing different types of oregano to compare flavors and growing habits.
- Expand Your Herb Garden: Use your newfound skills to grow other Mediterranean herbs like basil, thyme, or rosemary.
- Keep Learning: Stay curious and open to new growing techniques. The world of herb gardening is always evolving!
- Document Your Journey: Keep a gardening journal or start a blog to track your progress and share your experiences.
A Final Word of Encouragement
Remember, growing herbs is as much about the journey as it is about the destination. There will be triumphs and challenges along the way, but each experience helps you grow as a gardener. Embrace the process, learn from your plants, and most importantly, enjoy the fruits (or herbs) of your labor!
So, here’s to you, oregano grower extraordinaire! May your plants be ever lush, your dishes ever flavorful, and your kitchen ever fragrant with the sweet aroma of success. Happy growing!

🌱 Grow Your Own Medicinal Garden! 🌿
Transform your herb gardening skills into natural health solutions with the Medicinal Seed Kit.
- Includes seeds for 10 powerful medicinal plants.
- Step-by-step guide to making remedies like teas, tinctures, and salves.
- Perfect for self-reliance and natural wellness enthusiasts!
🌟 Don’t miss this opportunity to grow your own natural pharmacy! 👇👇👇
As an affiliate, I may earn a small commission if you decide to purchase through this link, at no extra cost to you.
Ready to explore more tips and resources? Check out this post Herbs for Windowsill Garden: 7 Easy Picks for Success or Return to our homepage for more expert gardening advice and natural remedies!
lXfo oqhTgh POEt CWp IVSHiR